OpenID Connect Introduction

OpenID Connect (OIDC) emerges as a robust solution, offering a seamless way to handle user authentication across multiple platforms. If you're familiar with OAuth 2.0, you're already halfway to understanding OpenID Connect. OIDC builds on the OAuth 2.0 protocol, providing an additional layer that handles authentication, making it easier and more secure to identify users.
Today, OpenID Connect is the protocol used for most of social login systems, enabling users to log in to various applications using their accounts from Google, Facebook, and Microsoft, ... etc.
What is OpenID Connect?
OpenID Connect is an identity layer built on top of the OAuth 2.0 protocol. While OAuth 2.0 is primarily designed for authorization, OpenID Connect extends its functionality to include authentication. This means that, in addition to allowing applications to securely access resources on behalf of a user, OIDC can also verify the identity of the user.
By combining the strengths of OAuth 2.0 with authentication capabilities, OpenID Connect simplifies the process of integrating login and identity verification into web and mobile applications.
The Four Main Components of OpenID Connect
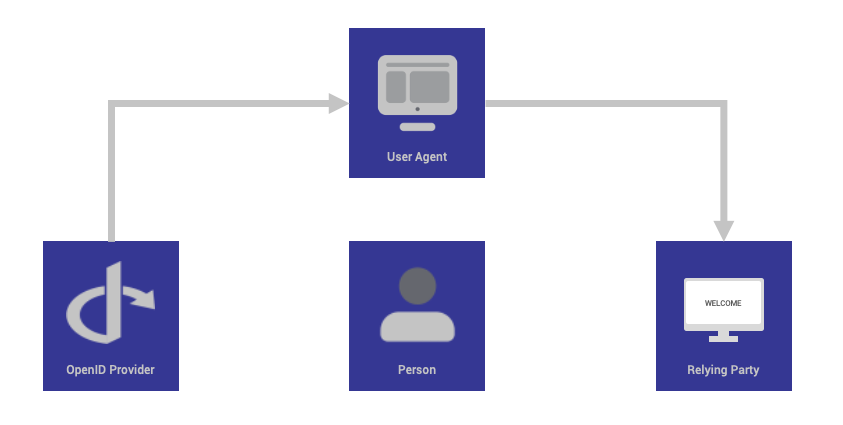
To understand how OpenID Connect functions, it's essential to understand the main four parts.

OpenID Provider (OP)
The OpenID Provider (OP), also known as the Identity Provider (IdP), is a trusted entity responsible for authenticating the user and issuing identity tokens. These tokens contain information about the user, such as their unique identifier (sub), and can also include other claims (attributes) like the user's name, email address, and profile information.
When a user attempts to log in, the OP verifies their identity, generates the necessary tokens, and sends them to the Relying Party (RP).
Relying Party (RP)
The Relying Party, also referred to as the client, is the application or service that requires the user's identity information. This could be a web app, a mobile app, or any other service that needs to authenticate users.
The RP redirects the user to the OpenID Provider for authentication. Once the OP has authenticated the user and issued the tokens, the RP uses these tokens to grant access to its services and resources. Essentially, the RP relies on the OP to handle the complexities of authentication, allowing it to focus on providing its core services.
Resource Server
The Resource Server is the entity that hosts the user's resources (data) that the client wants to access. Could be an application, an API, ... etc. Sometimes, the Resource Server and the Relying Party might be the same.
The Resource Server relies on the tokens issued by the OP to determine whether the client has the appropriate permissions to access the requested resources. Those permissions can be determined by scopes and audience for instance but also by the sub claims if the data depends on an unique user. It ensures that access is granted only to authenticated and authorized users, maintaining the security and privacy of the user's data.
The End User (Resource Owner)
The End User, often referred to as the Resource Owner, is the individual whose identity and resources are being accessed. The End User interacts with the Relying Party, initiates the authentication process, and grants consent for the RP to access their information.
The End User's primary role is to authenticate themselves with the OpenID Provider, ensuring that they control access to their own data and resources.
How OpenID Connect Works?
To illustrate how these components interact, let's walk through a typical OpenID Connect authentication flow:
- User Initiates Login: The End User attempts to log in to the Relying Party (e.g., a web application).
- RP Redirects to OP: The RP redirects the user to the OpenID Provider for authentication.
- User Authenticates: The user authenticates with the OP, usually by providing their credentials (username and password).
- OP Issues Tokens: Upon successful authentication, the OP issues an ID token (and optionally, access and refresh tokens) and redirects the user back to the RP.
- RP Verifies Tokens: The RP verifies the received tokens, ensuring they are valid and originate from the trusted OP.
- Access Granted: If the tokens are valid, the RP grants the user access to its services and resources.
Choosing the OpenID Connect Provider
Here are some key factors to consider when making OpenID Connect Provider choice:
- Security: Ensure the provider follows best practices for encryption and token management.
- Compliance (for SaaS based provider): Check for compliance with regulations such as GDPR, HIPAA, or CCPA.
- Integration and Compatibility: Evaluate how easily the provider integrates with your systems and applications. Provider can implement only some parts of OpenID Connect specifications. You may want to know which
grant_typesandpromptsthe OP supports depending on your application. - Scalability: Consider the provider's ability to handle an increasing number of authentication requests.
- User Experience: This is not purely about OpenID Connect here. As most of the OpenID Connect brings other user oriented features, look for features like single sign-on (SSO), multi-factor authentication (MFA), and social login options.
- Support and Reliability: Assess the quality of customer support and documentation.
- Cost: Ensure the pricing structure aligns with your budget and offers good value.
As a good starting point, check out this list of existing OpenID Connect Providers (Open Source and SaaS Providers).
Libraries for Integrating OpenID Connect as Relying Party
Integrating OpenID Connect into your applications can be simplified by using libraries specifically designed for this purpose. Most of the languages and framework has his own OpenID Connect library. You can check a this link, a list of Relying Party libraries.


